Have a read to run through the top tips for making your pre-show video
Our Video
Watch our example video of Ben’s Journey for Dance Live!
Software
First things first, you need to have the right software to make sure you can edit the video properly. For our video, we edited it on a Mac so therefore used iMovie, this can be used on iPhone, iPad and Mac Desktop device. Below is handy table to show you which software you should be using depending on what device you are using.
| Device Type |
Editing Software |
| Apple Mac (iPhone, iPad, Computer) |
iMovie
FCPX or Adobe Premiere (advanced) |
| PC Windows |
Windows Movie Maker |
| Android (Samsung, HTC, Huawei etc) |
Adobe Premier Clip
Quik |
| Other Software’s |
Filmic Pro for Smart Phones |
For the purposes of this video, we can outline what we did on iMovie to make the end product. If you need any assistance in using other software’s then don’t hesitate to get in touch, and we will endeavour to aid you as best as we can.
Top Tips
So, before any discussion of which software you need to use, you need to get your shots! The Dance Live! Team, with the help of workshop leaders (thanks to Robin Creative Media) have assembled some top tips to get you off your feet with recording.
- No filming in portrait! Always make sure you are turning the phone and capturing everything in landscape. This means you won’t get the ‘black bars’ either side of the film.
- Get your sound right. Sound captured in the film (e.g. interviewing, people talking, live singing) is one of the only compartments of filming that you cannot do much with in the edit. So, if you are planning on interviewing anyone in your video then make sure you are filming in a quiet place, and after the shot, play the film back to make sure the sound is loud and clear!
- A tidy location is a good location. If you are interviewing someone, make sure the background is as tidy as possible. This means trying your best to get a neutral coloured wall, with nothing hanging on it and tidying up any background clutter you may have
- Know your light. Make sure you are not silhouetting anyone in your video. The Sun should always be behind you (the person recording) so it lights the subject of the video well and doesn’t drown them in shadow.
- 3 second rule. Make sure you leave 3 seconds of no action at the beginning and the end of every shot. This will help you in the editing process, it will give you the buffer you need to cut shots precisely while editing.
- Say no to the zoom. Instead on zooming in on a subject, try taking lots of different shots of them (close ups, wide shot) to make your video look more professional. This will also encourage you to create lots of short videos to stitch together rather than one really long one and will help give your video that extra touch.
Creating Our Video
For our video, we had three distinct steps to make sure we were getting the most out of our time while filming.
Step 1 – Storyboard
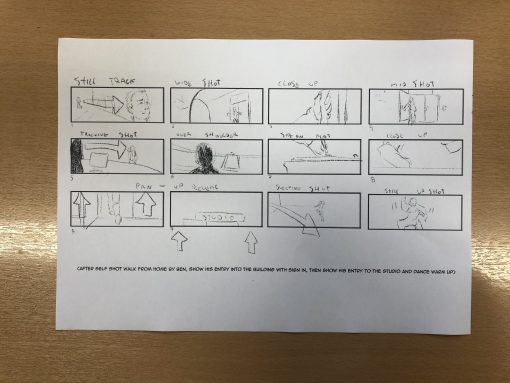
Taking 10 minutes to think about the pattern or story that we wanted our video to follow really helped when we were trying to gather all the shots we needed. It also meant that we could be clear with Ben, who we were filming, about what we wanted him to do. Below is the storyboard that one of our team mocked up, although yours can be anything from a bullet point list of all the things you want to happen to a full-on frame by frame plan.
Step 2 – Filming
Using our storyboard, we had a pretty good idea of what we needed to capture, so it was then a case of making sure we are getting as many interesting shots as possible to make sure we are telling the story in an interesting way. Below is a collection of the different shots you can use to tell your story. We recommend capturing the same action in 2-3 different shots so in editing you can cut them to make them more interesting.
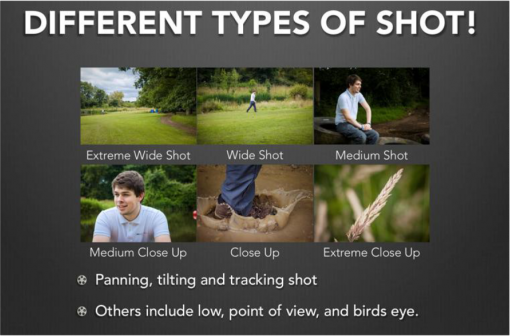 Image credit of Robin Creative Media
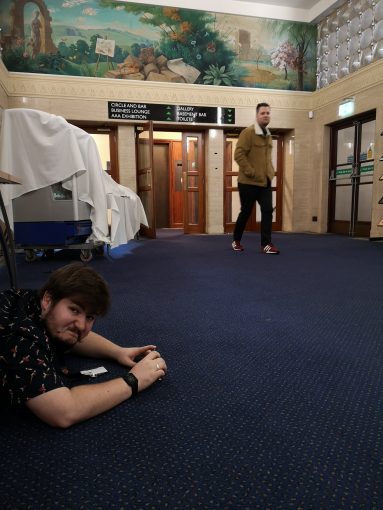
Here you can see our dedicated director, Jonathan, capturing a close up shot of Ben’s feet.
Step 3 – Editing
This section is where we can get into the details. With our film above we had lot of footage to play with. So, following the storyboard again we uploaded all the footage we were wanting to use onto iMovie and began editing. For an in-depth step by step blog about how to do this easily, head to the link below.
https://blog.storyblocks.com/video-tutorials/getting-started-imovie/
Pssst – on a side note, if you want to turn down the audio in the clip so you can add in music audio or take out background noise:
Select the clip that you want to mute
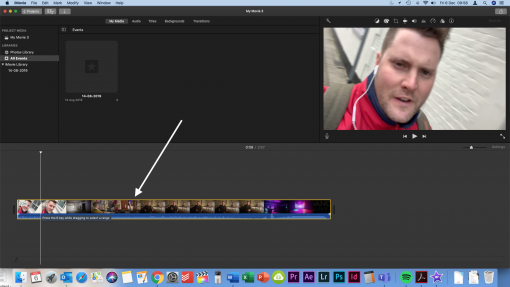
Select the speaker shaped button in the top right
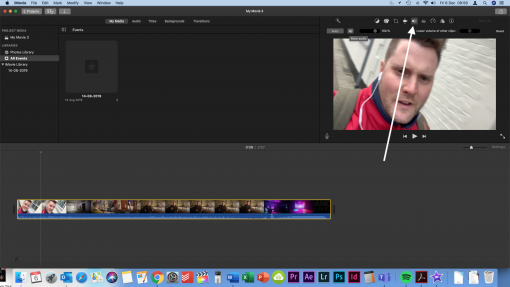
Select the button below it that controls the overall mute/sound of the clip
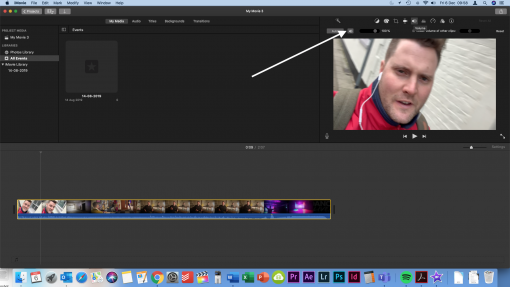
Press it so you see the red line through the button.
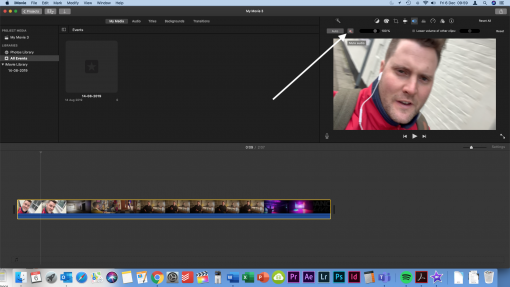
Have fun!
Making videos can be great fun and a great experience for everyone taking part. If you need any more help with the ins and outs of video making or need any more content to do with the requirements of Dance Live! then please get in touch and we will endeavour to make more blogs!